IMG_20190405_213325-01

FREE VST INSTRUMENTS | [PIANO & ELECTRIC PIANO]

As a musician having access to high-quality virtual instruments is crucial for creating captivating compositions. While there are numerous commercial options available, it’s always a welcome surprise to discover exceptional free alternatives. They will not be as high quality as a mutlisampled steinway by waves, or has “character” like our the office piano (see pic above) but these do the job, some pretty damn well. We present five VST instruments that focus on piano and electric piano sounds. Best of all, these instruments are free to install and use,


  • Keyzone Classic Keyzone Classic is a versatile piano plugin that offers a range of expressive sounds. It features four sampled piano variations, including Grand Piano, E-Piano, Honky-Tonk, and Tack Piano. With adjustable parameters such as sustain, reverb, and volume, Keyzone Classic provides a customizable and realistic piano experience. Download it for free from: Keyzone Classic

  • LABS by Spitfire Audio – Soft Piano Soft Piano, a part of the LABS series by Spitfire Audio, is a beautifully captured instrument that provides a mellow and intimate piano sound. It is perfect for adding emotional depth to your compositions. The plugin offers a simple user interface with controls for reverb, dynamic range, and pedal volume. Explore this at: LABS by Spitfire Audio

  • 4Front Piano 4Front Piano is a sample-based instrument that emulates the sound of a classic grand piano. It offers adjustable parameters like reverb, release, and velocity response. The plugin’s sound make it a good addition to your VST collection. Download it for free from: 4Front Piano

  • Keyzone Classic 2 Keyzone Classic 2 is a successor to the original Keyzone Classic and builds upon its strengths. This plugin delivers an array of well-sampled piano sounds, including Grand Piano, Bright Piano, Jazz Piano, and E-Piano. With enhanced sound quality and additional features, Keyzone Classic 2 is an excellent choice for musicians seeking authentic piano tones. Get your hands on this free gem at: Keyzone Classic 2

  • MrRay73 Mark II For those seeking a remarkable electric piano sound, MrRay73 Mark II is a must-have VST instrument. This plugin meticulously emulates the legendary Fender Rhodes Mark II electric piano, providing an authentic vintage vibe. MrRay73 Mark II offers various parameters to tweak, including tone, tremolo, and a customizable graphic equalizer. Experience the nostalgic charm of this free electric piano plugin by visiting: MrRay73 Mark II

Free VST instruments like the ones mentioned above demonstrate that good-quality piano and electric piano sounds are accessible to everyone, regardless of your pocket. By incorporating these plugins into your music production arsenal, you can explore a wide range of expressive piano tones and enrich your compositions. Some of these sound more interesting when put though a tape emulator plugin (especially when you turn all tape controls to max, then apply reverb, then compression!) Download these free instruments, experiment with their features, have fun our kid!

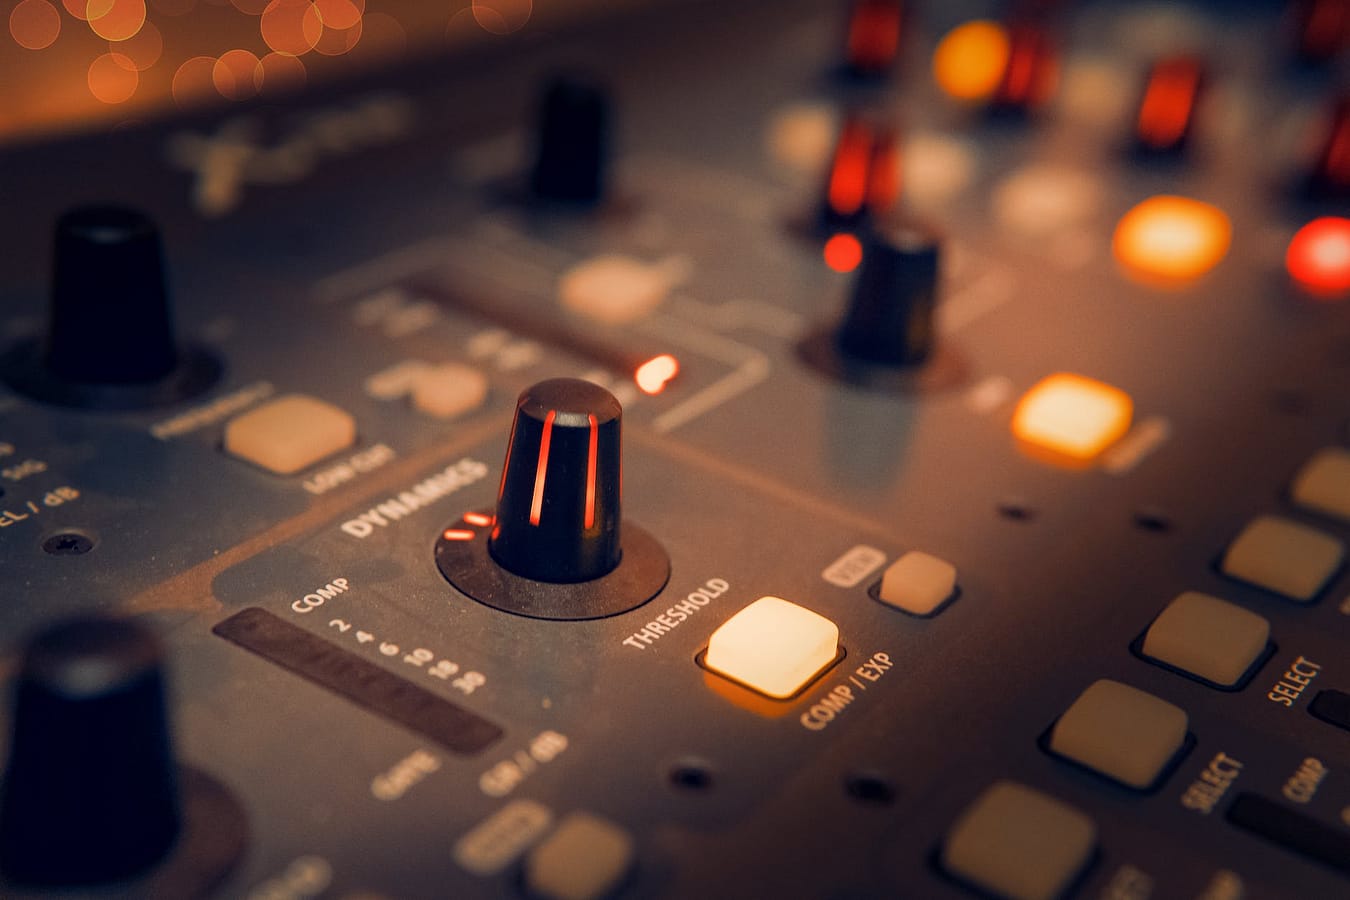
black and gray audio mixer

BLUFFERS GUIDE TO | COMPRESSION

In audio processing, a compressor is a device or software tool that reduces the dynamic range of an audio signal. It works by automatically decreasing the volume of louder parts of the audio signal while leaving the quieter parts unchanged, resulting in a more consistent overall volume.

The compressor achieves this by comparing the level of the incoming audio signal to a predetermined threshold level. If the signal level exceeds the threshold, the compressor reduces the gain (amplification) of the signal by a certain amount, known as the ratio. For example, a 2:1 ratio means that for every 2 dB of input level above the threshold, the compressor will only allow 1 dB of output level increase.

In addition to the threshold and ratio settings, a compressor may also have controls for attack and release time, which determine how quickly the compressor engages and disengages, respectively. These parameters can have a significant impact on the resulting sound, as they affect the way the compressor reacts to transients and overall loudness changes in the audio signal.


A compressor is useful in audio processing for several reasons:

  1. Dynamic range control: By reducing the difference between the loudest and quietest parts of an audio signal, a compressor helps to maintain a more consistent and controlled volume level. This is particularly important in music production and broadcasting, where a balanced and controlled sound is desired. It prevents sudden jumps in volume, making the audio more pleasant to listen to and ensuring that no parts of the signal get lost or overwhelmed.
  2. Increased perceived loudness: By reducing the dynamic range, a compressor allows you to increase the overall volume of the audio signal without causing distortion or clipping. This can be useful in situations where you want your audio to have a more impactful and powerful presence.
  3. Improving intelligibility: In speech applications, such as podcasts or public address systems, a compressor can help improve the clarity and intelligibility of the spoken words. By reducing the level of background noise or overly loud consonants, a compressor can make the speech more balanced and easier to understand.
  4. Controlling transients: Transients are short, sudden bursts of sound that occur in many audio sources, such as drums, percussion, or plucked instruments. Compressors can be used to tame the sharp attack of transients, making them less prominent and bringing them closer in level to the sustained portions of the sound. This can help to achieve a more even and controlled sound.
  5. Creative sound shaping: Compressors are not only used for control and correction but also for creative sound shaping. By adjusting the attack, release, and ratio settings, compressors can be used to add punch, sustain, or character to audio sources. They can be employed to shape the envelope of a sound, emphasize or de-emphasize certain elements, and create unique textures or effects.

The basic concept and principles of compression remain the same across different applications, whether it’s in TV and radio broadcasts or music studios and digital audio workstations (DAWs). However, there may be some differences in the specific characteristics and settings of compressors used in these different contexts

  1. Hardware vs. software: In professional music studios and DAWs, compressors are often implemented as software plugins running within a digital audio environment. On the other hand, TV and radio broadcasts may use dedicated hardware compressors or a combination of hardware and software processing. The choice of hardware or software can affect the specific features, controls, and sonic characteristics available.
  2. Signal chain and workflow: In music production, compressors are typically applied during the mixing and mastering stages as part of a more extensive signal processing chain. Compressors used in this context often offer a wide range of controls and parameters to finely shape the sound. In TV and radio broadcasts, compressors are commonly used during the live or real-time broadcast process to ensure consistent volume levels and control dynamics. The compressors used in broadcast environments may prioritize ease of use and straightforward operation to accommodate quick adjustments and ensure reliable operation.
  3. Broadcast standards and regulations: TV and radio broadcasts are subject to specific technical standards and regulations regarding loudness levels, dynamic range, and overall audio quality. Broadcast compressors may include features like peak level control, automatic gain adjustment, or specialized metering to comply with these standards. They may also incorporate specific algorithms or presets tailored for broadcast applications.
  4. User interface and metering: Compressor plugins used in music studios and DAWs often provide detailed visual representations of the compression process, including waveform displays, gain reduction meters, and envelope graphs. These visual aids help audio engineers fine-tune the compression settings. In contrast, compressors used in broadcasting may have simpler interfaces with intuitive controls and clear metering to facilitate quick adjustments during live broadcasts.

While there may be variations in the specific implementations and features, the core purpose of compression remains consistent across different applications. Whether it’s in TV, radio, or music production, compressors are employed to control dynamics, maintain consistent levels, and shape the sound to achieve the desired sonic result.


A LIST OF FREE COMPRESSORS AND A LINK TO THEIR DOWNLOAD PAGE

There are several options for free compressor plugins that you can use to explore and experiment with compression. Here are some popular choices:

  1. Variety of Sound ThrillseekerLA: This is a free compressor plugin that emulates the classic LA-2A compressor. It offers a simple interface with just a few controls, making it easy to use and understand.
  2. Klanghelm DC1A: DC1A is a free compressor plugin known for its simplicity and musicality. It provides a transparent and versatile compression sound with minimal controls for ease of use.
  3. TDR Kotelnikov: This is a highly regarded free compressor plugin by Tokyo Dawn Labs. It offers a wide range of compression options, including precise control over attack, release, and knee parameters.
  4. Molot by VladgSound: Molot is a free compressor that provides vintage-style compression with a lot of character. It offers various compression modes, saturation, and other features for shaping the sound.
  5. Density MKIII by Variety of Sound: This is another free compressor plugin that emulates analog compression. It offers flexible compression settings and a vintage-inspired sound.

These are just a few examples, and there are many more free compressor plugins available from different developers. When exploring free compressor plugins, it’s a good idea to research user reviews, check the compatibility with your specific DAW, and consider the features and characteristics that align with your needs and preferences.

uhe-tryrell-leeds-studio

FREE VST INSTRUMENTS | SYNTHS [DANCE & RAVE]

We’ve discovered a selection of high-quality VST instruments that are absolutely free to download and use in your Digital Audio Workstation (DAW). These plugins specialize in dance music sounds and offer great versatility for your productions.


VST stands for Virtual Studio Technology, and it’s a software interface that allows plugins to be used within a DAW. VST instruments emulate various synthesizers, drum machines, and other electronic music devices, providing an extensive palette of sounds to experiment with.

Installing VST instruments is a straightforward process. Most plugins come with an installer that guides you through the installation steps. Once installed, you can access the instruments directly from your DAW’s plugin menu. It’s a seamless integration that opens up a world of sonic possibilities and creativity.


  • Dexed by Digital Suburban: Dexed is a powerful FM synthesizer plugin that emulates the iconic Yamaha DX7. With its vast sound library and intuitive interface, you can create rich, evolving textures and classic FM tones. Get Dexed for free here: Download Dexed
  • Tyrell N6 by u-he: Tyrell N6 is a compact, yet feature-rich virtual analog synthesizer. It offers a wide range of classic analog sounds, from warm pads to punchy basses. The user-friendly interface and versatile modulation options make it a go-to choice for many producers. Download Tyrell N6 here: Get Tyrell N6
  • LABS by Spitfire Audio: LABS is a series of free virtual instruments from Spitfire Audio, renowned for their exceptional sample libraries. Within LABS, you’ll find a diverse collection of sounds, including strings, pianos, drums, and more. Each instrument has its own unique character, perfect for adding depth to your dance music productions. Explore LABS here: Discover LABS
  1. TAL-NoiseMaker by TAL Software: TAL-NoiseMaker is a versatile subtractive synthesizer that covers a wide range of sounds, from gritty basslines to soaring leads. Its intuitive interface and extensive modulation capabilities make it a popular choice for both beginners and experienced producers. Start making noise with TAL-NoiseMaker here: Download TAL-NoiseMaker
  • SQ8L by Siegfried Kullmann: SQ8L is a software model of the Ensoniq SQ80 synthesizer, known for its lush pads and atmospheric textures. This VST instrument faithfully captures the essence of the original hardware, allowing you to create captivating sounds with a nostalgic touch. Experience the SQ8L here: Grab SQ8L
bass cab hartke leeds studio music

STUDIO LIFE | BASS AMPLIFICATION

When it comes to playing the bass guitar, having the right equipment is crucial to achieving the desired tone and sonic impact. One of the most important components of a bassist’s arsenal is the bass amplifier. Bass amps are specifically designed to handle the low frequencies produced by the bass guitar, providing the power and clarity needed to cut through the mix and create a strong foundation for the band. In this article, we delve into the world of bass amps, exploring their key features, types, and what to consider when choosing the right one for your needs.

Understanding the Basics: Before we dive into the various types of bass amps, it’s important to understand the fundamental components that make up these amplifiers. A typical bass amp consists of three main sections: the preamp, power amp, and speaker(s). The preamp shapes the tonal characteristics and provides control over features such as gain, EQ, and effects. The power amp amplifies the signal from the preamp and delivers it to the speakers, which ultimately produce the sound that you hear.

Types of Bass Amps:

  1. Solid-State Bass Amps: Solid-state bass amps use transistors to amplify the signal. They are known for their durability, reliability, and affordability. Solid-state amps generally have a clean and clear sound, and they are well-suited for genres that require a precise and articulate bass tone, such as jazz and funk.
  2. Tube Bass Amps: Tube (or valve) bass amps utilize vacuum tubes to amplify the signal. They are cherished for their warm, rich, and harmonically complex tone. Tube amps tend to exhibit a more dynamic response and natural compression when pushed, making them popular among rock, blues, and vintage enthusiasts. They often require more maintenance and can be heavier and costlier than solid-state amps.
  3. Hybrid Bass Amps: Hybrid bass amps combine the best of both worlds by incorporating both solid-state and tube technologies. These amps use solid-state circuitry in the preamp section and tubes in the power amp section, providing a blend of reliability, versatility, and tube-like warmth.
  4. Modeling Bass Amps: Modeling bass amps employ digital technology to simulate the characteristics of various amp models, speaker cabinets, and effects. They offer a wide range of tonal possibilities, allowing bassists to replicate the sounds of different amps and experiment with diverse effects. Modeling amps are ideal for players who require versatility and want to explore various tones without investing in multiple physical amps.

Considerations When Choosing a Bass Amp:

  1. Power: Consider the wattage of the bass amp based on your playing needs. Higher wattage amps provide more headroom, allowing you to play at higher volumes without distortion. Smaller wattage amps are suitable for practice and smaller venues, while larger wattage amps are better suited for live performances and larger venues.
  2. Tone and EQ Controls: Look for a bass amp that offers comprehensive tone-shaping capabilities. A good EQ section with bass, mid, and treble controls allows you to tailor your sound to match your playing style and the musical genre you’re performing.
  3. Portability: Depending on your needs, consider the size and weight of the amp. If you’ll be frequently traveling or gigging, a lightweight and compact amp will be easier to transport.
  4. Connectivity and Features: Check the available inputs and outputs of the amp. Look for features such as built-in effects, headphone outputs for silent practice, direct recording outputs, and external speaker outputs.
  5. Budget: Set a realistic budget range and explore options that offer the best value for your investment. Consider both the initial cost of the amp and potential maintenance costs if you choose a tube-based model.

Choosing the right bass amp is a vital decision for any bassist seeking to unlock their true potential and achieve their desired sound. Whether you prefer the clean precision of a solid-state amp, the warm and dynamic response of a tube amp, the versatility of a hybrid amp, or the tonal exploration offered by a modeling amp, there is a perfect choice for every player.

Consider your specific needs, such as power requirements, tonal preferences, portability, and available features when selecting a bass amp. Take the time to research and try out different models, and if possible, test them in various playing environments to gauge their performance.

Remember, the bass amp you choose should complement your playing style, genre preferences, and long-term aspirations. It should empower you to create a strong foundation for the music while providing the necessary flexibility to explore different sonic territories.

Investing in a quality bass amp is an investment in your musical journey. So, unleash the thunder, find the perfect bass amp that resonates with your style, and let your bass lines rumble with power and clarity. The world awaits your booming sound!


Taking good care of your bass amp, especially if it’s a valve (tube) type, is essential to ensure its longevity and optimal performance. Here are some tips to help you maintain and protect your bass amp:

  1. Proper Handling and Transportation:
    • When moving or transporting your amp, always handle it with care. Avoid dropping it or subjecting it to sudden shocks or impacts.
    • Use protective cases or covers specifically designed for amplifiers to shield your amp from scratches, dust, and moisture.
    • If you need to transport the amp frequently, consider investing in a road case with padding for added protection.
  2. Tube Maintenance:
    • Tubes are delicate components and can be affected by vibrations. Make sure the tubes are properly secured in their sockets before moving or transporting the amp.
    • Allow your amp to cool down before moving it to prevent thermal shock to the tubes. Tubes should be handled with caution as they can get hot during operation.
    • If your amp uses replaceable tubes, follow the manufacturer’s recommendations for tube replacement intervals. Over time, tubes can wear out and affect the overall sound quality of your amp.
  3. Ventilation:
    • Make sure that your amp has adequate ventilation to prevent overheating. Very important this. Amplifiers generate heat during operation, and proper ventilation is crucial for optimal performance and longevity.
    • Avoid placing the amp in enclosed spaces or covering it with fabrics or objects that obstruct airflow. Keep the vents and fan (if applicable) free from dust and debris.
  4. Powering On and Off:
    • When turning on your amp, make sure to follow the recommended power-up procedure provided by the manufacturer. This often involves waiting for a few seconds after switching on the power before engaging the standby switch or playing.
    • Similarly, when powering off your amp, follow the recommended procedure to allow the tubes to cool down gradually. Avoid abrupt power-offs, as they can potentially damage the tubes.
  5. Cleaning:
    • Regularly clean the exterior of your amp using a soft, lint-free cloth. Be gentle and avoid using abrasive cleaners or solvents that can damage the finish.
    • Periodically clean the input/output jacks and potentiometers (volume, tone controls) using contact cleaner to remove any dirt or debris that may affect their functionality.
  6. Regular Maintenance:
    • Consider having your valve amp serviced periodically, especially if you notice any issues with sound quality.
    • A technician can inspect and test the tubes, check the circuitry, and perform any necessary maintenance or repairs to keep your amp in optimal condition.

By following these care tips, you can ensure that your bass amp, especially valve types, remains in excellent condition, providing you with great tone and reliability for years to come.

CABLES LEEDS REHEARSAL STUDIO YORKSHIRE

STUDIO LIFE | CARING FOR YOUR CABLES

Let’s talk about something that often gets neglected in our quest for pristine sound quality: audio cables. We invest a lot of time and money in building our dream audio setups, but we often forget to give proper attention to the lifelines that carry the music to our ears. Fear not, though! Today, we’re going to dive into the world of cable care and explore some tips to keep those audio cables working like a charm for a long, long time.

  1. Handling with Tender Loving Care: First things first, let’s start with the basics. When handling your audio cables, make sure to do it with gentle hands. Avoid yanking, twisting, or bending them excessively. Remember, cables have feelings too! Treat them kindly, and they’ll reward you with uninterrupted sonic pleasure.
  2. Say No to Knots: Oh, the dreaded knot! It’s the bane of every cable’s existence. Resist the temptation to tie your audio cables into intricate knots. Knots can strain the internal wiring and lead to signal degradation. Instead, opt for proper coiling techniques. A loose over-under coil or a figure-eight wrap works wonders in keeping your cables tangle-free and in great shape.
  3. Mind Your Connectors: Connectors are like the gateway to audio bliss, so it’s crucial to keep them in tip-top condition. Regularly inspect your connectors for any signs of wear or corrosion. If you spot any issues, give them a gentle clean with a soft cloth and a bit of contact cleaner. And remember, when connecting or disconnecting cables, hold them by the plugs, not by the cable itself. This reduces strain on the cable and keeps those connectors snug and secure.
  4. Cable Storage: When it comes to storing your cables, it’s best to avoid chucking them into a tangled mess in a dusty corner. Invest in cable management solutions like cable ties or Velcro straps to keep them neatly organized. Coiling your cables and storing them in a dedicated cable bag or case helps protect them from physical damage, dust, and unwanted critters. Plus, it saves you the hassle of untangling a labyrinth of cables every time you want to listen to music.
  5. Steer Clear of Extreme Conditions: Audio cables aren’t fond of extreme environments. Keep them away from excessive heat, cold, moisture, and direct sunlight. Extreme temperatures can affect the insulation and overall performance of the cables. Avoid placing them near radiators, heaters, or air conditioning vents. Instead, provide them with a cozy and moderate environment where they can thrive.
  6. Regular Check-Ups: Just like visiting the doctor for regular check-ups, your audio cables deserve some attention too. Periodically inspect them for any signs of wear and tear. Look out for cuts, frayed ends, or exposed wiring. If you spot any damage, it’s best to replace the cable or get it repaired promptly. Prevention is key to keeping your cables in excellent working condition.

By following these simple tips, you can extend the lifespan of your audio cables and ensure a seamless listening experience for years to come. So, take a moment to show your cables some love and care. They are the unsung heroes that bridge the gap between you and your favorite tunes. Happy listening!


WHAT`S THE DIFFERNCE BETWEEN CHEAP AND EXPENSIVE CABLES?

  1. Build Quality: One of the primary factors influencing the price of audio cables is the quality of materials used in their construction. Expensive cables often feature high-grade materials such as premium metals for conductors (e.g., silver or gold), superior insulation materials, and robust connectors. These materials not only enhance the cable’s durability but also contribute to better signal transmission and reduced interference. Cheaper cables, on the other hand, may utilize lower-quality materials to keep costs down.
  2. Engineering and Design: Cables that have undergone extensive engineering and design work tend to be pricier. Manufacturers invest in research and development to create cables with advanced features like improved shielding, better noise rejection, and optimized signal flow. These design considerations can result in enhanced audio quality and a more immersive listening experience. Cheaper cables, though functional, may not have the same level of meticulous engineering behind them.
  3. Brand Reputation: Brand reputation plays a significant role in pricing. Established and reputable brands often command higher prices due to their track record of delivering quality products. Lesser-known or generic brands may offer more affordable options but might not have the same level of brand recognition or consistent quality control.
  4. Marketing and Packaging: The cost of marketing and packaging can also impact the price of audio cables. Extensive marketing campaigns, endorsements, and elaborate packaging designs can add to the overall cost. These expenses are usually factored into the retail price, resulting in higher-priced cables. In contrast, less marketing-intensive brands may be able to offer their products at a more affordable price point.
  5. Subjective Factors: It’s worth noting that audio perception is subjective, and personal preferences vary. Some individuals may claim to hear noticeable differences between expensive and cheaper cables, while others may not perceive a significant disparity. The debate over whether expensive cables offer tangible benefits or if it’s just a placebo effect continues among audio enthusiasts. Ultimately, it’s up to each individual to decide what they believe makes a noticeable difference in their listening experience.

In summary, the price variation in audio cables can be attributed to factors such as build quality, engineering, brand reputation, marketing expenses, and subjective perceptions. It’s important to strike a balance between your budget and your desired level of audio quality when choosing cables. Ultimately, what matters most is that you enjoy your music and have a great audio experience, whether you opt for a budget-friendly option or invest in a higher-priced cable.

Rock Circus - Leeds - Rehearsal rooms - Don Van (2)

BLUFFERS GUIDE TO | AFFORDABLE MIXING DESKS

Mixing desks, also known as audio mixers or soundboards, play a crucial role in achieving high-quality sound production. We will explore affordable options for mixing desks, what they are best suited for, where to buy them, and provide a breakdown of different models and their prices


  1. Understanding Mixing Desks and Their Functionality:

A mixing desk is a device that allows you to control and adjust multiple audio inputs and outputs simultaneously. They enable you to blend and balance various sound sources, such as microphones, instruments, and playback devices, into a cohesive mix. Mixing desks come in various sizes and configurations, ranging from compact models with a limited number of channels to larger desks suitable for complex audio setups.


  1. Choosing the Right Mixing Desk for Your Needs:

When selecting a mixing desk, it’s essential to consider your specific requirements. Here are a few factors to consider:


a. Number of Channels: Give some thought to the number of inputs and outputs you’ll need based on your audio setup. A small home studio might only require a few channels, while a live sound engineer may require more extensive options.

b. Features: Consider features such as built-in effects, equalization controls, auxiliary sends, and USB connectivity for recording purposes. These features can significantly enhance your mixing capabilities…..they also can be totally useless too if you know you`ll never need them.

Personally, I like to grow with my equipment, maybe some time down the line when youre working on a different project these things may become useful.

c. Portability: If you require a mixing desk for live performances or on-the-go recording, consider a compact and portable model that can be easily transported


a. Behringer Xenyx Q802USB (8-channel): This compact mixer is perfect for small home studios or podcasting setups. Price: £75-£100.

b. Yamaha MG10XU (10-channel): Featuring built-in effects and USB connectivity, this mixer offers versatility and high-quality audio. Price: £180-£280.

c. Allen & Heath ZED-10FX (10-channel): Ideal for both live performances and studio recording, this mixer includes built-in effects and EQ controls. Price: £250-£300.

d. Soundcraft Signature 12MTK (12-channel): With its multi-track USB recording capabilities and professional-grade preamps, this mixer is perfect for advanced home studios. Price: £380-£450.

..but bear in mind these prices are approximate and may vary depending on the retailer and location.


Mixing desks, like any electronic equipment, require regular maintenance to ensure optimal performance and longevity. While the specific maintenance procedures may vary depending on the model and manufacturer, here are some general tips to keep your mixing desk in good working condition:

  1. Keep it clean!!: Dust and debris can accumulate on the surface and inside the faders and knobs of your mixing desk, potentially affecting its performance. Regularly dust the surface and use compressed air or a soft brush to clean the faders, knobs, and other components. Avoid using excessive liquid cleaners, as they can damage the sensitive electronics.

  • Protect against moisture and spills: Liquids are shit when it comes to the circuitry of your mixing desk. Be cautious when placing drinks or other liquids near the desk and consider using a protective cover if there’s a risk of spills. If a spill occurs, immediately power off the mixer, disconnect it from the power source, and clean up the liquid carefully. Allow it to dry thoroughly before using it again.
  • Check and clean connectors: Over time, the connectors on your mixing desk may accumulate dust, dirt, or oxidation, leading to connectivity issues. Inspect the connectors regularly and clean them using contact cleaner or a specialized cleaning solution. Ensure the connectors are securely plugged in and avoid excessive force when inserting or removing cables.
  • Service and repairs: If you encounter persistent issues or suspect a malfunction, consult the manufacturer’s documentation or contact their customer support for guidance. But beware, a lot of people who repair audio gear will NOT touch a desk, simply because of the amount of work it takes to get access to the problem that needs repair.
  • Firmware and software updates: Some mixing desks may have firmware or software that can be updated to enhance functionality or fix bugs. Check the manufacturer’s website any available updates

By implementing these maintenance practices, you can keep your mixing desk in good shape, ensuring optimal performance and extending its lifespan.

snare drum rock circus leeds studio

THE BLUFFERS GUIDE TO | SNARE DRUMS

When buying a snare drum as a beginner, there are several factors to consider. Here are some important things to look for:

Drum Size: Snare drums come in various sizes, typically measured by diameter and depth. A common size for beginners is a 14-inch diameter and 5.5-6.5-inch depth, as it offers a versatile sound suitable for different genres.

Construction and Material: Snare drums can be made of different materials like wood, metal (such as brass or steel), or acrylic. Each material produces a distinct sound. Wood snare drums are warm and versatile, while metal snare drums tend to have a brighter and more cutting sound. Consider the sound characteristics you prefer and choose accordingly.

Snare Wires: The snare wires, also known as the snare bed, are the metal wires that run across the bottom head of the drum. They produce the snare sound when the drum is struck. Ensure that the snare wires are properly tensioned, adjustable, and in good condition.

Drumhead Quality: The drumhead greatly affects the overall sound. Look for a drum with a high-quality, durable drumhead. Some drums come with factory heads, while others may require you to purchase drumheads separately. Remo and Evans are reputable brands known for producing reliable drumheads.

Hardware and Adjustability: Check the drum’s hardware, including the lugs, throw-off mechanism, and tension rods. Ensure that they are sturdy and allow for easy adjustment. A good throw-off mechanism will enable you to engage and disengage the snare wires smoothly.

Budget: Consider your budget and find a snare drum that fits within your price range. As a beginner, you don’t necessarily need the most expensive drum. There are quality options available at various price points.

Brand Reputation: Research reputable drum brands known for their quality and reliability. Some well-known brands include Ludwig, Pearl, Yamaha, Mapex, and DW (Drum Workshop).

Playability and Feel: Lastly, try to play the snare drum or read reviews to get a sense of its playability and feel. Everyone has different preferences, so choose a drum that feels comfortable and responsive to your playing style.

By considering these factors, you can make an informed decision when purchasing a snare drum as a beginner. It’s also a good idea to seek advice from a mate who is a experienced drummer

CHANGING THE SOUND


Once you have purchased a snare drum, there are several ways you can change its sound to suit your preferences. Here are some common methods to modify the snare drum’s sound:
Snare Wire Adjustment: The tension of the snare wires greatly affects the snare drum’s sound. You can adjust the tension by using the snare strainer or throw-off mechanism located on the side of the drum. Tightening the wires produces a crisp and sensitive response, while loosening them creates a more relaxed and buzzy sound. Experiment with different tension levels to find the desired snare response.
Snare Wire Replacement: If you want to significantly alter the sound of your snare drum, you can try replacing the snare wires themselves. Different snare wire models offer unique tonal characteristics. For example, steel wires provide a brighter and more pronounced sound, while nylon or gut wires offer a warmer and vintage tone. Explore different snare wire options to find the sound that suits your style.
Drumhead Replacement: Changing the drumhead is another effective way to modify the snare drum’s sound. Drumheads come in various thicknesses, coatings, and materials, each impacting the overall tone. Thinner heads tend to produce more sensitivity and resonance, while thicker heads provide greater durability and control. Experimenting with different drumheads can help you achieve the desired sound.
Dampening: Controlling the drum’s resonance through dampening techniques can significantly alter the sound. You can use dampening products like gel pads, moongel, or even household items like tape or cloth to muffle the drumhead. Placing these dampening materials strategically on the drumhead or inside the drum can help control unwanted overtones and create a more focused sound.
Drum Tuning: Adjusting the tension of the drumhead at each tension rod affects the overall pitch and tone of the snare drum. Experiment with different tensions on each rod to achieve a desired sound. Higher tension produces a brighter and more focused sound, while lower tension creates a deeper and more open tone. Learning how to tune your drum can significantly impact its sound and versatility.
Drum Muffling: If you want to control the sustain or ring of the snare drum, you can add external muffling. This can be achieved by using products like snare drum rings, O-rings, or even applying duct tape or gaffer tape to the drumhead. By strategically placing muffling materials on the drumhead, you can control the length of sustain and achieve a drier sound.
Remember, modifying the snare drum’s sound is a creative process, and experimentation is key. Make small adjustments at a time and listen to the changes in sound. It’s also helpful to seek guidance from experienced drummers or drum technicians who can offer insights and techniques specific to your drum and desired sound.

ADDITIONAL LISTENING

Here are some more notable popular recordings and the types of snare drums that have been used in them:
“Hotel California” by Eagles:
Snare Drum: Ludwig LM400 Supraphonic (Standard/Pop Snare Drum)
“Stairway to Heaven” by Led Zeppelin:
Snare Drum: Ludwig LM402 Supraphonic (Standard/Pop Snare Drum)
“Sweet Child o’ Mine” by Guns N’ Roses:
Snare Drum: Pearl Reference Series (Standard/Pop Snare Drum)
“Superstition” by Stevie Wonder:
Snare Drum: Ludwig Black Beauty (Brass Snare Drum)
“Enter Sandman” by Metallica:
Snare Drum: Tama Starclassic Maple (Metal Snare Drum)
“Hey Jude” by The Beatles:
Snare Drum: Ludwig LM400 Supraphonic (Standard/Pop Snare Drum)
“Smooth” by Santana ft. Rob Thomas:
Snare Drum: DW Collector’s Series (Wood Snare Drum)
“Sultans of Swing” by Dire Straits:
Snare Drum: Ludwig Black Beauty (Brass Snare Drum)
“The Dance” by Fleetwood Mac:
Snare Drum: Yamaha Recording Custom (Standard/Pop Snare Drum)
“Master Blaster (Jammin’)” by Stevie Wonder:
Snare Drum: Yamaha Recording Custom (Standard/Pop Snare Drum)
guitar cab rock and roll circus leeds

THE BLUFFERS GUIDE TO | GUITAR CABS

FROM BIG TO SMALL WE LOVE THEM ALL


Guitar cabinets, also known as speaker cabinets or speaker enclosures, are an integral part of a guitar amplifier setup. They are designed to house and project the sound produced by the amplifier head and speaker combination. There are several types of guitar cabinets available, each with its own unique characteristics. Here are some of the common types:


Open Back Cabinets: These cabinets have an open rear panel, allowing sound to project in multiple directions. They typically produce a more airy and spacious sound with a wider dispersion. Open back cabinets can offer a more dynamic and less focused sound.


Closed Back Cabinets: Closed back cabinets have a sealed rear panel, which results in a more focused sound projection. They provide a tighter low-end response and enhanced low-frequency resonance. Closed back cabinets are often preferred for genres that require a more precise and controlled sound.


Convertible Cabinets: Some cabinets feature a removable back panel, providing the option to switch between open and closed configurations. These versatile cabinets offer flexibility, allowing you to adjust the sound to your preference or the specific playing environment.


Straight Cabinets: Straight cabinets have a standard rectangular shape and are the most common type of guitar cabinet. They are often equipped with one or multiple speakers arranged in a vertical configuration. Straight cabinets provide a balanced sound projection with good dispersion.


Slant Cabinets: Slant cabinets, also known as angled cabinets, have a trapezoidal shape with the top portion angled upward. The purpose of this design is to direct the sound toward the player’s ears, providing better monitoring on stage. Slant cabinets are commonly used in live performances.


Speaker Size: Guitar cabinets can come with various speaker sizes, typically ranging from 8 inches to 15 inches in diameter. Smaller speakers tend to produce a more focused sound with less bass response, while larger speakers can provide a fuller low-end and handle higher volume levels.


It’s important to note that the choice of guitar cabinet depends on personal preference, playing style, musical genre, and the specific sound you want to achieve. Experimenting with different cabinet types, speaker configurations, and sizes can help you find the perfect combination for your desired tone.

Why is it important to match the amp and cab?


Matching the amplifier head and speaker cabinet is important for several reasons:
Impedance Matching: Amplifiers and speaker cabinets have specific impedance ratings, typically 4, 8, or 16 ohms. It is crucial to match the impedance of the amplifier head with that of the speaker cabinet. Mismatched impedance can result in poor sound quality, loss of power, and potentially damage the amplifier or speakers. For example, if an amplifier designed for an 8-ohm load is connected to a 4-ohm cabinet, it can overload the amplifier and cause it to overheat or fail.

Power Handling: Amplifiers have different power ratings, typically measured in watts. Speaker cabinets are also rated for power handling, indicating the maximum wattage they can handle without distortion or damage. It is important to match the power handling capabilities of the cabinet to the output power of the amplifier. If the amplifier delivers more power than the cabinet can handle, it can lead to speaker damage or even blow out the speakers.

Tone and Response: Different amplifier heads and speaker cabinets have unique tonal characteristics. Matching the right combination can help you achieve the desired tone and response. For example, certain amplifier heads may sound better with closed back cabinets for tight low-end response, while others may pair well with open back cabinets for a more spacious sound. Experimenting with different combinations allows you to find the synergy that suits your playing style and musical preferences

Efficiency and Performance: Matching the amp and cab ensures that they work together efficiently, optimizing the overall performance. A well-matched combination allows the amplifier to deliver its power effectively to the speakers, resulting in better sound projection, clarity, and overall performance. It ensures that the speakers are driven optimally, maximizing their potential and producing the desired tone.


SIZE IS EVERYTHING

Guitar cabinets come in various sizes, typically defined by the diameter of the speaker(s) they house. Here are some common sizes available:


1×12: This refers to a cabinet with a single 12-inch speaker. 1×12 cabinets are popular for their portability, compact size, and focused sound. They offer a good balance between size and projection, making them suitable for small to medium-sized venues or studio settings.


2×12: A 2×12 cabinet features two 12-inch speakers. This configuration provides a fuller sound compared to a 1×12 cabinet, with a wider frequency response and improved low-end presence. 2×12 cabinets are often favored by guitarists who want more volume, a bigger stage presence, or a broader sonic footprint.

4×12: A 4×12 cabinet is an iconic and widely used configuration that includes four 12-inch speakers. It is commonly known as a “quad box.” 4×12 cabinets offer a powerful and massive sound, with substantial low-end response and high volume capabilities. They are frequently used in live performances where a significant stage presence is desired, especially in rock and metal genres.


Other Sizes:
While 1×12, 2×12, and 4×12 cabinets are the most common, there are other sizes available as well. These can include 1×10, 1×15, 2×10, 2×15, and more. Each size has its own tonal characteristics and suitability for different musical styles, venues, and personal preferences.


It’s important to note that the size of the cabinet can influence the overall sound and projection. Smaller cabinets tend to have a more focused and directional sound, while larger cabinets offer a broader dispersion and greater low-end response. The choice of cabinet size depends on factors such as the desired sound, playing style, genre, venue size, and personal preference.

NOT ALL CABLES ARE EQUAL

When connecting a guitar amplifier head to a speaker cabinet, you should NOT use an instrument cable. Instead, you should use a speaker cable.


Speaker cables are specifically designed to handle the high-power signal that is sent from the amplifier to the speaker cabinet. They have a thicker gauge wire and are built to handle the higher current and voltage levels associated with speaker-level signals. Using an instrument cable to connect an amplifier head to a speaker cabinet can result in poor signal transfer, loss of tone, and potentially damage the equipment.

To clarify, instrument cables are suitable for connecting guitars, basses, or other instruments to amplifiers or effects pedals, where the signal levels are much lower. However, when it comes to connecting an amplifier head to a speaker cabinet, it is essential to use a speaker cable to ensure proper signal transmission and to prevent potential damage to your gear.
cropped-profile-1.png

MUSIC DOCUMENTARIES | TECHNOLOGY & THE FUTURE OF MUSIC MAKING

AI AND MUSIC FESTIVAL DOCUMENTARY

This short film guides you through some of the ….. Artificial intelligence and art will shape our future – is the human experience the only one worth expressing? Could you be moved by a piece of art made by a computer?

In 2021, a festival held in Spain explored these questions and more through Music created by algorithms that reaches out to the human experience.

MUSIC ALL AROUND US

A different take on the subject. Here is a programme filmed in 1979 trying to guess at the future of music and computers. Made by the BBC in the late seventies, this programme has a very science based approach to the subject but it`s very educational and entertaining – which I guess is the very essence of our public broadcaster!

HOW JAPANESE TECH CHANGED THE WORLD

It hard to fathom what life was like when portable music devices didnt exsist... Its been a long journey … and the nation who made most of that journey possible was Japan. Hand held meant carrying a transistor radio, or a boombox. Certainly not personal. So when the walkman arrived, plus the other copies it influenced, it changed everything.

THE RISE OF SPOTIFY

Once upon a time you had record companies, several of them, they controlled the flow of music, until file sharing became feasible enough that you had access to millions of peoples music collections for very little cost. This changed a lot of things, it meant a different sector of business was now a gatekeeper – albeit with no actual gate – an absolute nightmare for the old guard.

Along comes someone who figures out its not about ownership, especially when it comes to devices you access digital content on. Stream the music, but make it an easy experience, easier than torrenting. Bingo, spotify comes and steps in front of Apple`s music business model of downloads on an ever expanding itunes site and gives stuff out for free, before getting users to pay for the premium tier. Here`s the lowdown on how and why it happened.